If you have started blogging recently or if you simply want something quick, easy and FREE to make your photos look more appealing and professional, this is for you!
I came across Picmonkey few months back and I must admit I am kinda hooked. I love this FREE software so much that I find myself gravitating towards picmonkey waaay more than photoshop or other professional photo editing softwares out there.
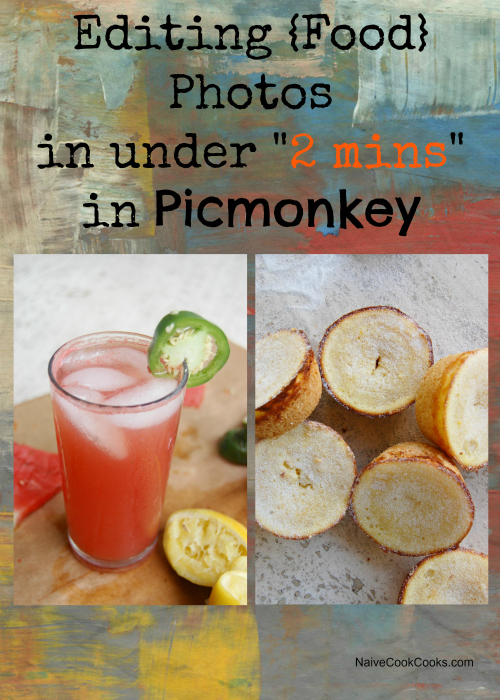
So today I got no food recipe for you but instead something super useful and for those of you struggling to give their food photos some zaa zaa zoom zoom, this is for YOU. “Editing Food Photos In Under 2 Mins using PICMONKEY”. Even if you are into fancy photo editing softwares, this is a keeper. For those rainy days when your free trial ends (ahem!) or simply you are in no mood to go the full circle, this is one good, time saving shortcut which gives a more appealing and professional look to regular photos.
P.S I am not getting any compensation from Picmonkey in no way. This is in no way a promotional post! I really enjoying using this and get great results and this is the MAIN reason I wanted to write this post so YOU can benefit from what I know.

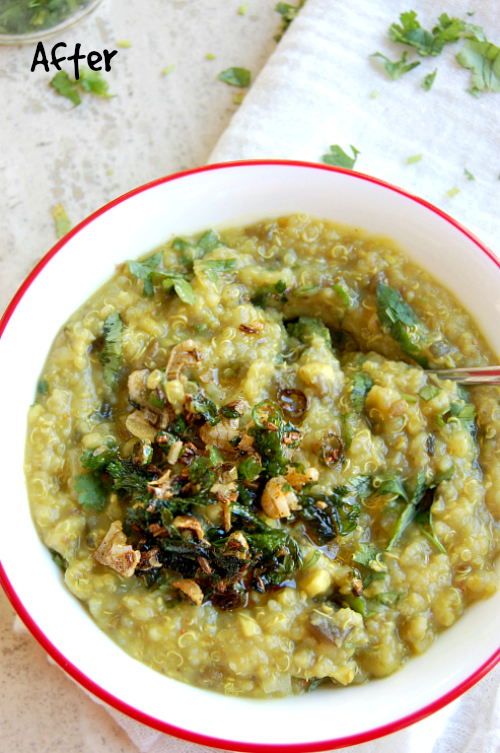
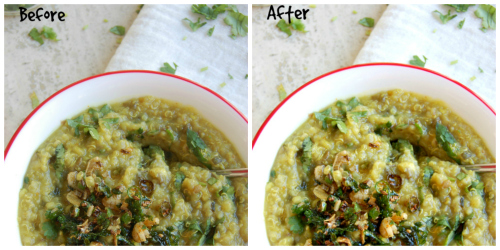
This is the picture of a Quinoa lentil veggie bowl recipe I posted few months ago. This is how it looked after NO editing. You can tell the colours look somewhat faded, it’s not bright enough, clarity is not really much as all you can see is a bowl full of something (not easily recognizable).
So after using this software Picmonkey, I was able to fix all these issues. Do remember though that this software is in no way a magic software!! If the images are super blurry, not appealing, it CAN NOT make them look gorgeous! Images have to be good to an extent of 70-90% and then this software will notch them up to 100%.
Ok so lets talk business now. I will be explaining the process step by step to make it easier to understand and if you go through any problem, shoot me a quick comment or email. I will be more than happy to help you!
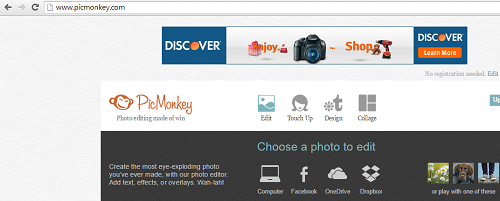
STEP 1 : Type picmonkey in your browser. Click on edit. Once you click on edit, it will give you an option you see in the above picture. You can select your picture you want to edit either from your computer, facebook, onedrive, dropbox or flickr. Flickr option is not visible in the above picture but you will see it on their site. Once you select a photo to edit, it will open up in picmonkey.
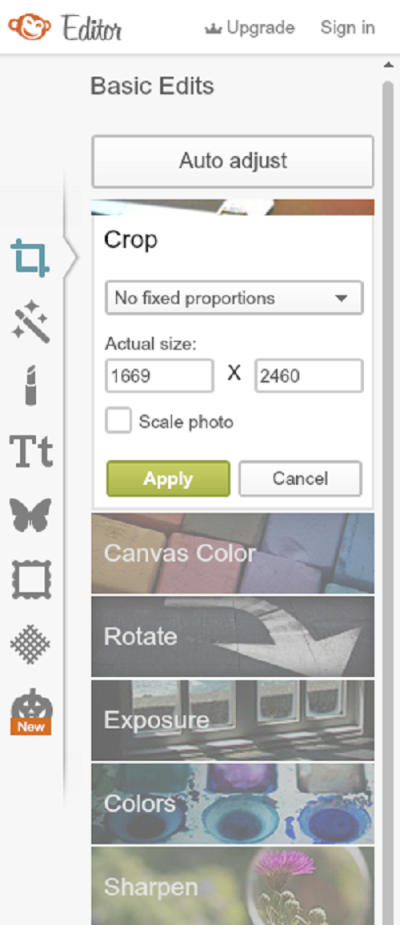
STEP 2: On the left side of the page, you will see a long colum with different options you can use to edit your pictures. The first one “BASIC EDITS” has all the options which you can see in the picture above. The first thing I do is crop my image if I want to hide some elements or make it look more pretty or for any reason whatsoever. It’s NOT a must to use this but I find myself using it sometimes to give it a more cleaner look. Here if you already know what dimensions you want, you can insert them in the boxes saying actual sizes. I mostly don’t really know the sizes I want so I go on the picture and play with the rectangle they provide to adjust how much part you want to keep. I set it as per my needs and then click on apply.
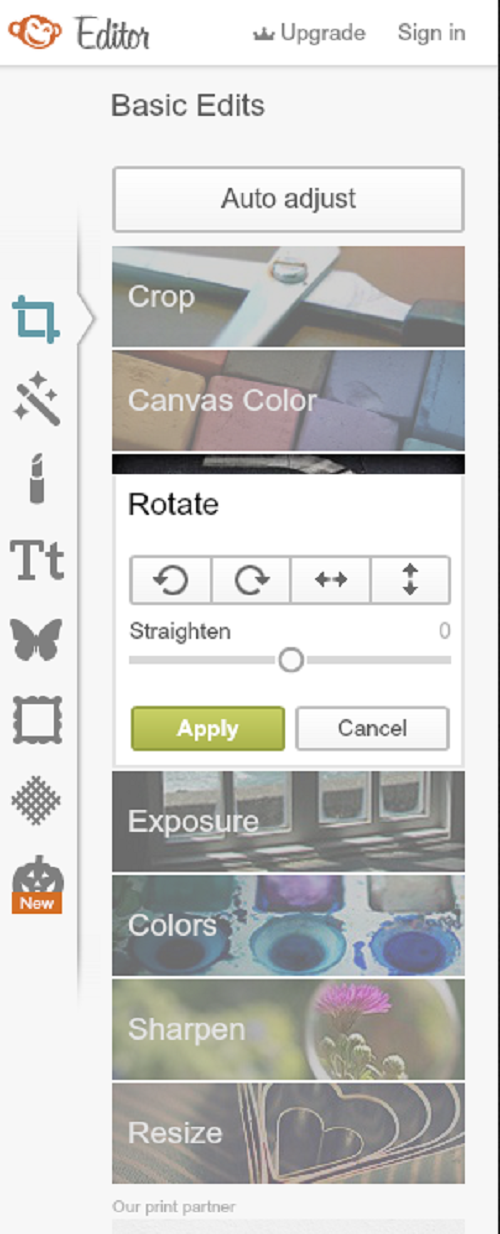
STEP 3: Them I move on ROTATE option under BASIC EDITS. I use it only if I want to rotate my picture or straighten it.
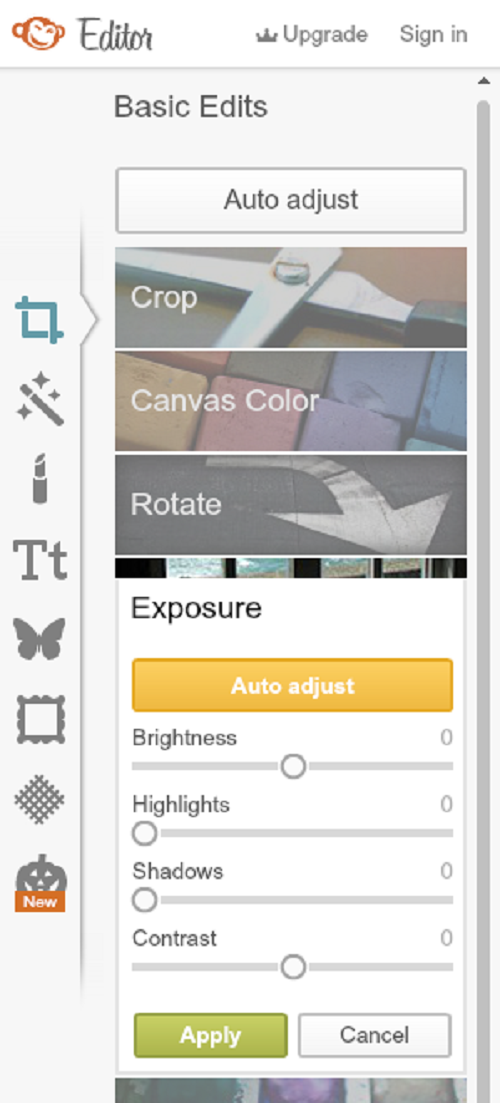
STEP 4: Next step is my favorite and kind of an important one. Exposure under BASIC EDITS. I first adjust the brightness and then contrast. I don’t usually use highlights and shadows but you can totally play with them and see if you need them or not. I usually keep my numbers for brightness and contrast pretty close. Say I increase brightness level to 12% then I go and increase my contrast to 13-15% to balance the colours.
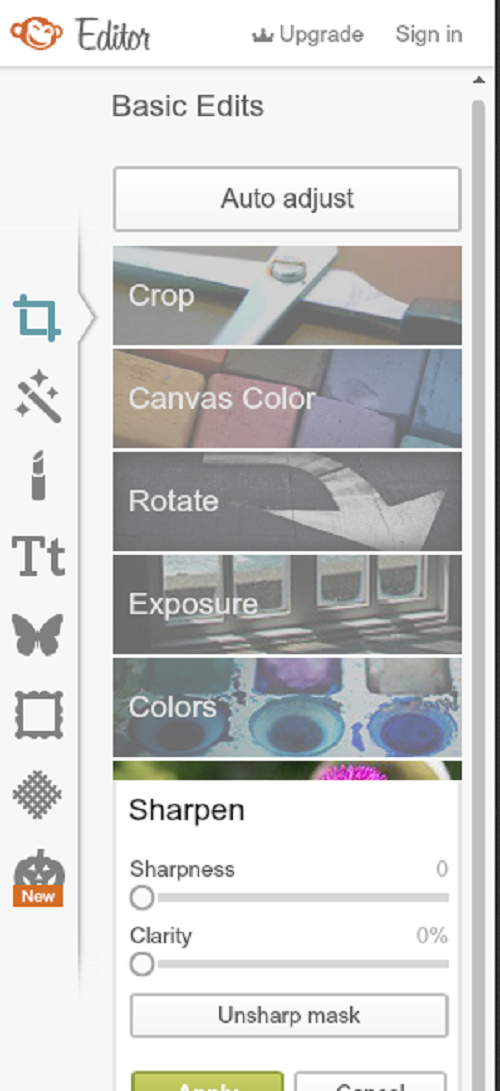
STEP 5: Next comes sharpen under BASIC EDITS and it really helps to open up the images and make them more clearer. I usually increase sharpness to upto 4 and clarity to 12-15 % for good results. But as I said before too, there is no set rule. Go ahead and play with these and find your best settings.
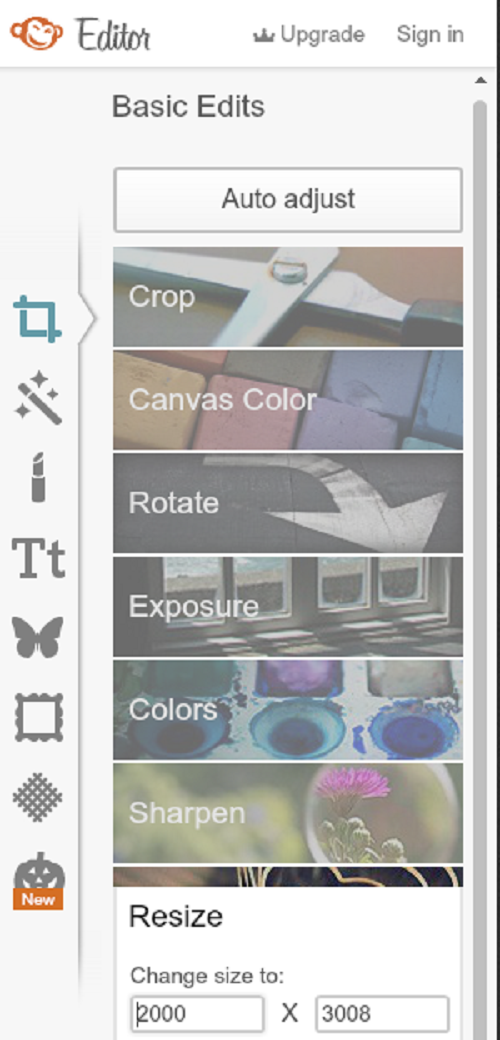
STEP 6: The last step is resizing your images. I usually resize them before posting on wordpress.
Tada that’s it! These are the main steps you need to know to elevate your pictures but there is more. You can add texts, effects, frames and more. I will do one or few more posts on Picmonkey to cover the remaining topics!
Hope this really helps you to make your pictures look more appealing and gorgeous. Let me know what you think about this post and if you have any questions or doubts!
More Blogging Resources:
Hi Ami, great post, very informative. Thanks I need all the help I can get.
Hope this helps you Cheri!
Great post! I love PicMonkey too. It has “saved” several of my photos!
True!! I second you Elaine!
Thanks for sharing Ami! I’ve thought of using PicMonkey, but ever did. Looks pretty easy and more important-free. Will give it a try!
Mira let me know if you have other questions!
How great is PicMonkey?! Just amazing. Thanks for this post – great tips.
Glad you liked it!
Great tips– I’ve heard a lot of people rave about PicMonkey. I love Adobe Creative Cloud. I use quite a few of the applications in the suite, so I find it worth it. Plus, I am an educator, so get it at a much discounted rate!
Girl I am so jealous!! Hehe
great post Ami! I have used picmonkey only once to make a collage. I need to use it more often.
Yes try it Manali!! It’s really simple!
Great Post Ami! I just started using PicMonkey too and I love it! Such a great tool!! 🙂
I totally love it!!
Great post. I use pic monkey too as cant afford another program just now so pic monkey works great for me. I also really like the collage options.
Let me know if you have other questions related to it!!
I LOVE PicMonkey! I’m even worse that this though… half the time I edit it right on my iPhone with Line Camera. Ha!
Haha you are funny!!
This is such a great post, Ami! Love PicMonkey 🙂
Thanks girl!
I’ve just tried this program. Awesome! Thanks for the info, very useful!! Hugs from Argentina!!
Marisa
Aww Marisa I am so happy that it worked for you!! Hugs!!
Thanks for sharing, Ami! I have always used Creative Cloud for this kind of work, picmonkey is free! sounds great! I have to try it once.
Give it a try Savita and let me know if you have any questions!!
Such a great tutorial! I use PicMonkey sometimes to make collages, but have never edited photos on it. Very cool!
Thanks Sues!
This is such a helpful post, thank you for writing about this! I’ve used picmonkey to make collages but never looked into their picture editing options. I will definitely try it.
Kate give it a try. It’s really simple yet makes a huge difference!
I just stumbled on PicMonkey too and love it. Thanks for an awesome post!!!
I am glad that it helped you!
Pic monkey is a wonderful tool. Great post!
I love picmonkey too Jen!
Great post Ami! Love Picmonkey! 🙂
Hi,
I simply loved your blog. It’s brilliant in every possible way! 🙂
You may want to check my foodblog too at http://www.krispykadhai.wordpress.com . I can connect with you through the point that despite of working in a corporate you wanted something more appealing and fulfilling. 🙂 Same is the case with me. Looking forward!
Hi Ami, thank you for visiting my blog page.. you got a lovely blog. I wish I already know your site. You got lots of information for a beginner like me?.
hey thanks Lathiya!! I am happy that you found this useful and do let me know what else are you looking to learn so I can craft those posts too! 🙂